Lately I've ready about quite a few rocker arms seizing to the rocker shafts on KTM 08-11 450-530's and although I've never had a issue with any of the three 530's I've owned I figured it would be good insurance to update the rocker shafts.
Parts Needed: Two KTM 500 Rocker Arm Shafts, KTM part # 78036056200Here's a overview of how the rocker arms get oiled. Oil enters the rocker shaft on the cam end, then has to travel around the rocker shaft bolt, then out through the two small holes on the middle of the rocker shaft where it lubricates the rocker arms. The rocker arm bolt shank is waisted (thinned down) at the point where it passes through the inside of the rocker arm shaft, allowing oil to get by the bolt.
Oil flow path through the rocker shaft.

After doing some reading and now measuring it looks like the issue lies between the rocker shaft and the rocker shaft bolt. The hole on the end of the rocker shaft where the oil enters measures .252" wide, the bolt shaft is .255" at it's waisted point and the bolt hole is .278". Since the larger bolt hole crosses through the smaller oil supply hole there is a slight relief that allows just a little oil by the bolt shank, but it's not a very big gap.
I've read where you can update the 08-11 450-530 Rocker arm shafts to a 2012 shaft and it's a direct swap. Apparently KTM has updated the 2012 shaft for better oiling. I've also read where DJH from KTMtalk cut's a small groove inside the rocker shaft to allow more oil to get past the rocker arm shaft bolt.
After ordering up two 2012 500 rocker arm shafts It's time to remove the ones on my 2011 530 and see what the differences between the two shafts are. Start by removing the seat, fuel tank and skid plate. Any time your going to open up the valve cover spend some time and clean everything the best you can. A little time spent with some Windex and paper towels can prevent dirt from getting into your open engine as your bumping cables etc.

Disconnect the crankcase breather hose from the valve cover, I like to plug the hose with a plastic cap (red arrow) to keep anything from entering the hose while it's disconnected.

Next up remove the valve cover. After it's removed we need to get the bike set to TDC (Top Dead Center). With the rear tire lifted off the ground put the bike in 6th gear and roll the engine over by turning the rear tire by hand (You can remove the spark plug to make it easier to roll over but it's not necessary). Line up the two indent marks located on the camshaft sprocket and cylinder head (red arrows below) to get TDC.
Note: Make sure you are on top dead center on the compression stroke not 180 deg out, if you have the indents lined up but the valves are compressed then rotate the engine another 180 deg and line them up again. The valves should be fully closed and the rocker arms should have a little slack in them.

Now that the bike is at TDC I'll set the lock bolt (red arrow) to keep the bike from rotating accidently while the rocker shafts are out. I usually don't use this bolt when just measuring valve clearance but will in this case.
The lock bolt is located on the bottom right side of the engine and has a large copper washer under it. Pull this bolt, remove the washer and re-insert the bolt. Without the washer the bolt will engage the crank when the engine is at TDC and prevent it from turning.

Engaged

Work with one side at a time, I'll start with the Intake shaft. Remove the rocker shaft plug.
 Note:
Note: At this point measure your valve clearance on each valve and write it down, after installing the new shafts check them again to make sure everything is the same and within spec. Clearances could change if your swapping a worn shaft for a new one.
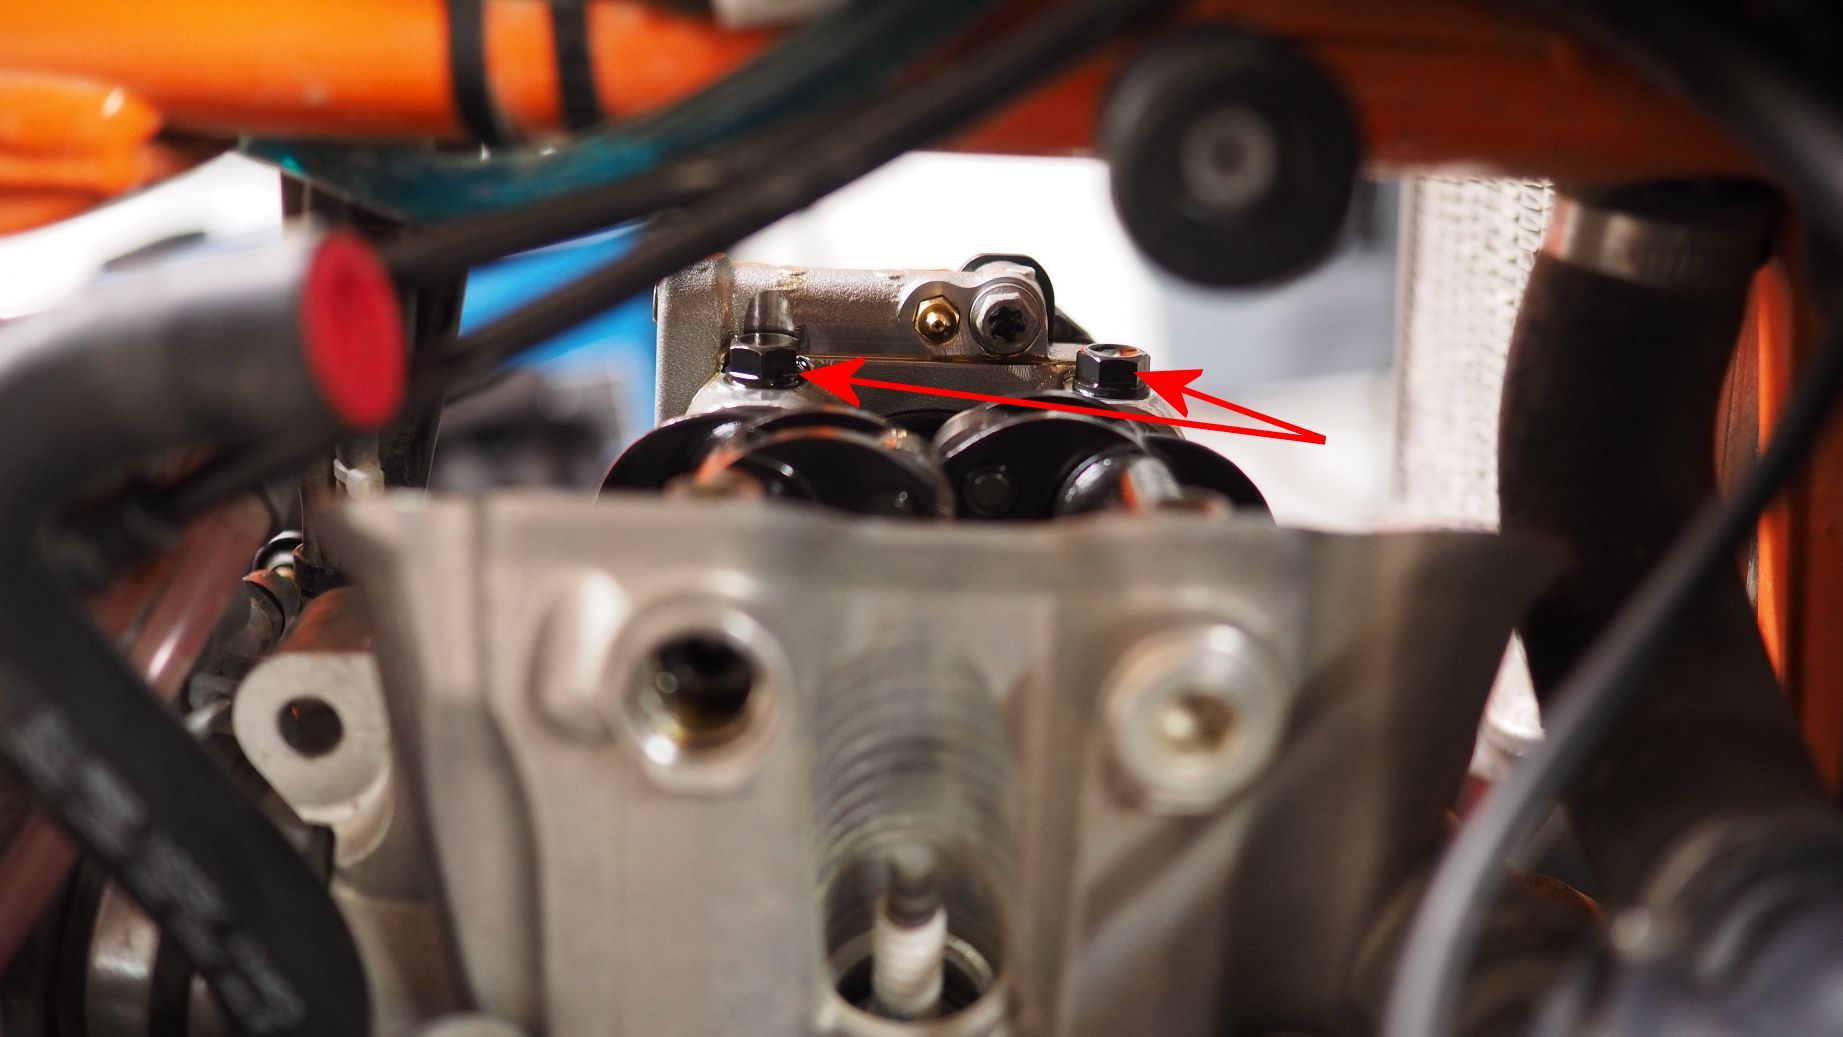
Next up using a 10mm socket remove the two rocker arm shaft bolts holding the shaft to the engine. Rocker shaft bolts shown below by red arrows.


Next remove the rocker arm shaft from the engine. The end of the shaft is threaded so you can thread in a bolt and use it to pull the shaft out, or you can just use a pair of thin long nose pliers to pull them out.


Intake shaft, rocker and bolts removed.

Measurements.
These measurements are the exact same on both the original 530 shafts and the new 500 shafts, no changes here. 

Slight bit of wear on the bottom of the rocker shaft. Since both the valve springs and the camshaft push up on the rocker arms the bottom of the shaft is always tight to the rocker arm and this is where you'll find the wear. This is also why it's important to re-insert the shafts in the same position if you are removing them to adjust valve clearance, since it could affect your reading if they are rotated.

Picture of the clearance between the waisted shank on the rocker shaft bolt and the rocker shaft. Not a lot of clearance but oil can get by the shaft.

You can see the small relief created by the large hole intersecting the smaller hole, it's at this point that oil can get by the bolt shank.

Here's the 2012 500 rocker shaft. There are a couple changes here, it has a small dimple that shows you orientation for the shaft (dimple goes up at the 12 o'clock position) and there is a thin flat ridge machined into the top of the rocker shaft. I presume this flat area is acting as a oil reservoir since it would offer a few thousands more clearance and allow oil to pool on top of the shaft.

I decided to modify the new shafts before install to increase oil flow to the rocker arms. I used a small round file to make a groove in one side of the rocker shaft at the point where the oil hole and bolt hole intersect. More oil can now flow around the rocker shaft bolt.
Note: Make sure you clean the inside of the shaft perfectly after filing since any metal particles left behind will go strait into the rocker arm.
File used....

Hard to see in this picture but the clearance along the filed groove has been opened up from .252" to .256", and should be a little better at the point of intersect between the two holes.
Stock

Groove filed to add extra oil flow.

Pre-oil the rocker shaft/rocker then install the new shaft and rocker arm back into the bike. Torque the rocker shaft bolts down to 11.06 ft lbs.

Repeat above procedure on the exhaust side.
Make sure the dimple on both shafts are facing up as pictured below before installing the rocker shaft caps.

Install the rocker shaft caps and torque to 14.75 ft lbs.
Re-install the valve cover and crankcase breather hose. Remove the crank lock bolt and re-install the copper washer.
That's it, hopefully this will prevent any rocker arms from locking up from lack of lubrication.
Hodakaguy
